Dual braking system install
Written by Glenn Hammack
Dual braking system install
|
My old brakes just weren't doing very well on my 1943 Willys. They were originally transplanted from a 1978 Firebird and didn't seem to be enough for my 4-wheel disc setup. I had an idea that a dual braking system might come in handy on the trail. I was visiting the Wilwood website and found their dual master cylinder setup. They normally go with a single brake lever which works both masters but I chose to use the single pedals, one for each master cylinder, in a side by side fashion so that I could step on both with one foot or selectively apply front brakes only (left pedal) or rears only (right pedal). I chose the 1 inch bore master for both ends (I wanted big volume) and the swinging pedals versus the floor mounted ones cause they could be mounted directly to the firewall and into the masters on the other side. I have Dana 44's from a 77 Wagoneer (full size) with Wagoneer disc calipers in front and 78 GM disc calipers in the rear. I ordered the parts from Summit Racing. I'll list the part numbers at the end of this page.... You can't order directly from Wilwood... |
|
|
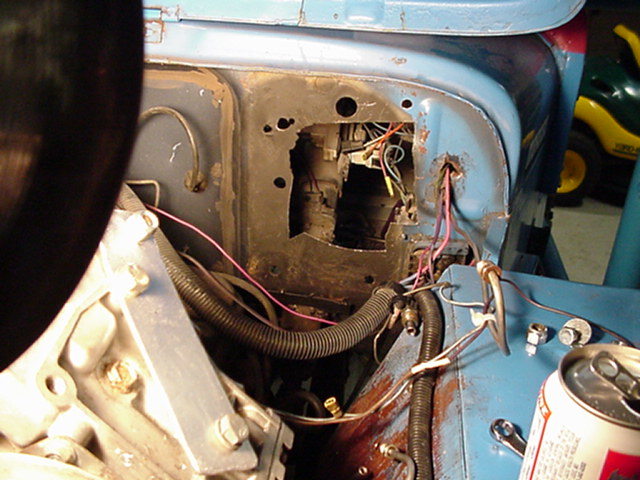
I got started by ripping out the old rusty, crusty Firebird system, including the pedal, master cylinder and leaky booster. As you can see, it left a gaping ugly hole in the firewall. I also had to use the sawsall (OH YEAH) to make it bigger. I don't care that it looks like crap. I'm gonna cover that up with my new steel plate. You can make yours nice and neat if you like. |
|
|
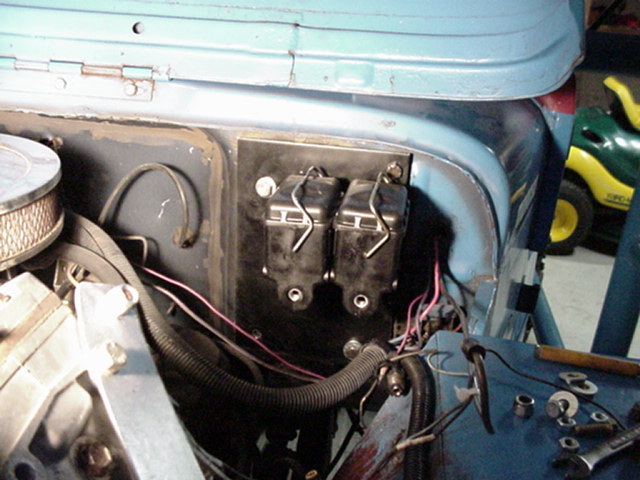
Not much to see from the inside except the pedal is missing. I stuffed it as far in the bottom of the trash can as I could cause I never wanna see it again. Look close and you can see my 'Microlok' button on the dash. We're gonna hook that up to the rear brake line later. (You can also see the switches for the Welder, K/C lights and On-board Air.) Now I have to make a template and see if I can get this setup to fit. I fashioned the first template out of 1/4 inch hard wood (paneling). Sorry, I didn't get a picture of that... |
|
|
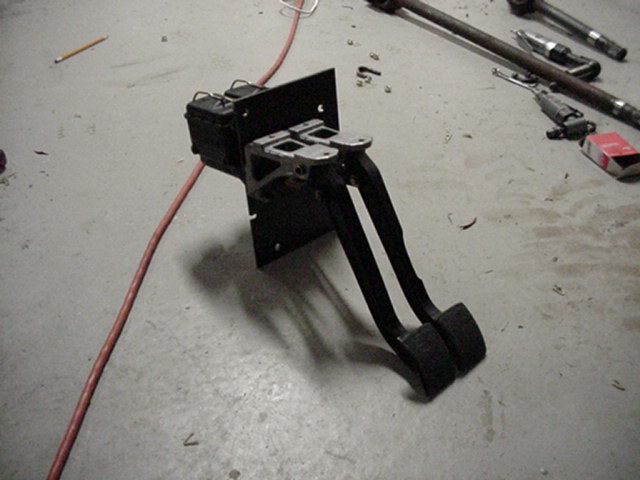
After several changes and cutting new templates out of wood, I
settled on a design that fit nicely. I took that last template to
a machine shop and had a 5/16 piece of steel stamped out and drilled
exactly the same. Then I mounted the pedals and masters and bolted em up
tight on the workbench. Had to grind a little bit off the lip of
the right pedal cause it was lightly bumping a switch on the steering
column. |
|
|
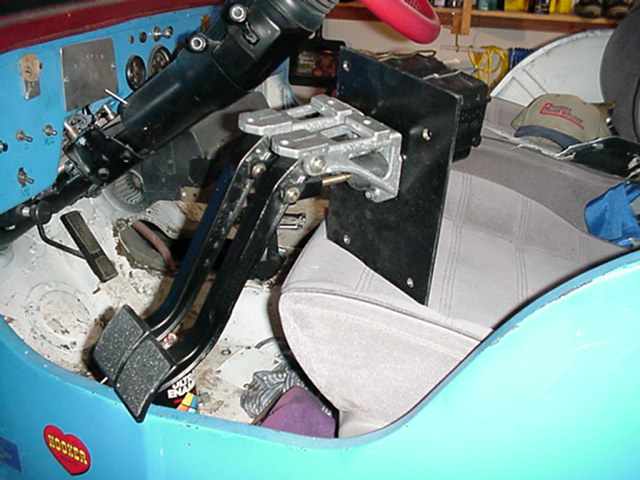
This is what they look like mounted to the steel template. The pedal end will be inserted into the ugly, gaping hole and the whole thing bolted to the firewall with hi-grade nuts and bolts. You slam the brakes with your big foot and that exerts a lotta pressure in that area. You could also weld it on (from the inside so it looks neat) but I'm not a welder so I chose to bolt em on. |
|
|
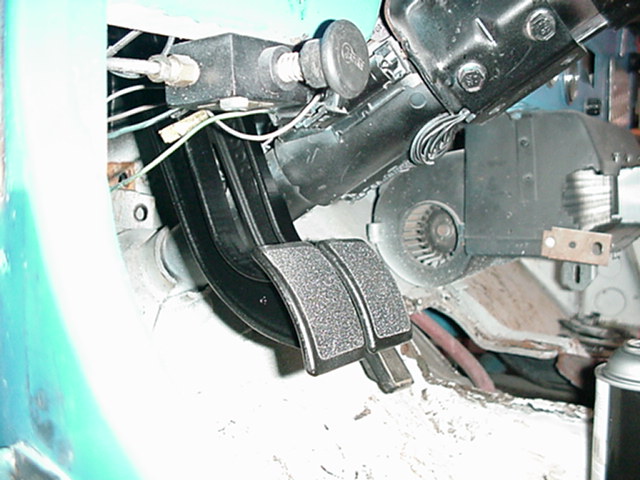
You can see how close together the pedals are but they don't interfere with each other and you can easily stab em both at the same time, with one foot. Be careful inserting the pedals down thru that hole. There are wires on the other side that can be pulled loose or shorted. Remember these 4 words. I TOLD YOU SO... Yep, voice of experience. |
|
|
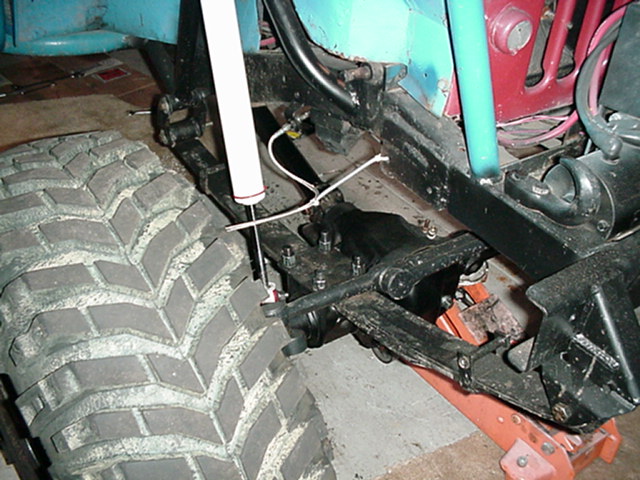
Here's a passing shot of my stainless brake lines. Got so much travel
now, I had to have long brake lines so I attached a soft spring to about
the middle of the line with a zip and zipped the other end of the spring
to a location on the frame. This keeps the lines from getting
caught on the tire or shock but also allows it to stretch all the way
out and pulls it back outta the way nicely. Looks funny but works great. |
|
|
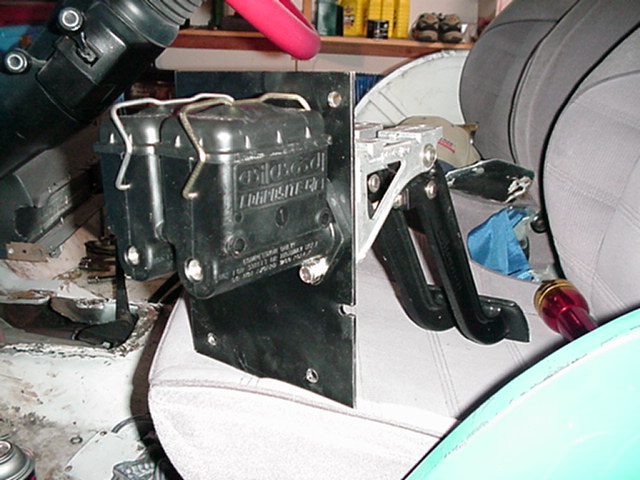
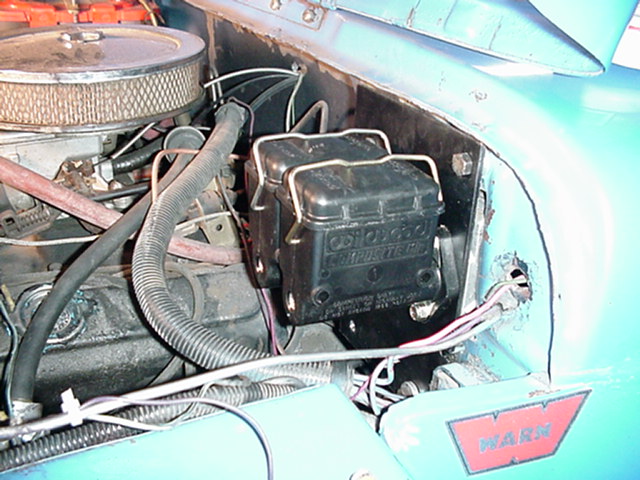
Here we have the template mounted in place on the firewall. Those dual masters are made of some composite material (not metal) but are very strong and can take more pressure than you can put on em with your big foot. The lines come right out the front on each one. |
|
|
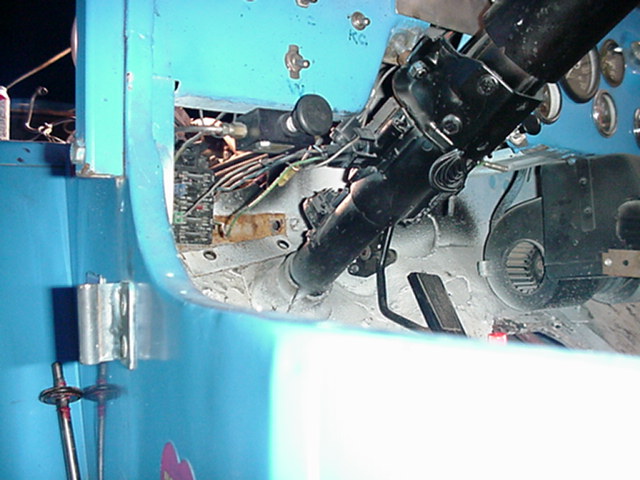
The pedals from the inside before the template was bolted up. You can see where I ground the right one a little. Don't worry. I didn't grind enough to weaken it. These things are super strong anyway. Hey, there's that 'Microlok' again. By the way, that was already there when I got the rig so I don't know where it came from. It is totally manual and works like a champ. |
|
|
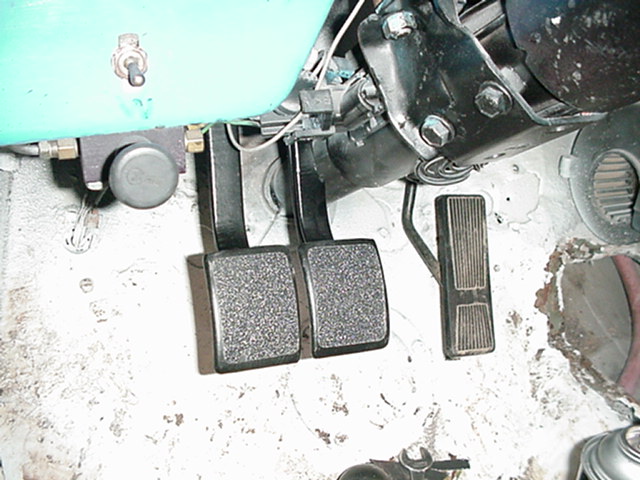
Now we're bolted up. See how close together they are. Can't wait to get
em all hooked up and actually have brakes again. Bleeding is quite a
chore. Rear lines are long and go downhill a ways so it takes a while to
get all the air out. Really Need a power bleeder for this job. |
|
|
Side shot. I had to use a couple of washers in one spot so the whole thing fit into the contours of the firewall. Oh, don't forget to plug the old vacumn line that used to run to the booster or your engine won't run good. It won't like all that extra air. |
|
|
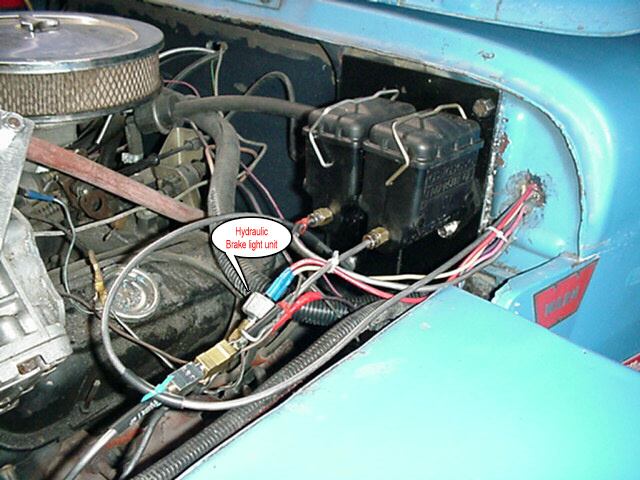
Here we have the completed setup. Brake lines in place, air bled out and brakes are working fantastic. Notice the left line (which is really the right brake pedal from inside), goes through the firewall to the Microlok and back out through the firewall, swooping down to connect to the line that feeds the rear discs. Also notice the hydraulic brake light sending unit which I plumbed in the front brake line and ran new wires from the old manual switch setup. Works perfectly. |
|
|
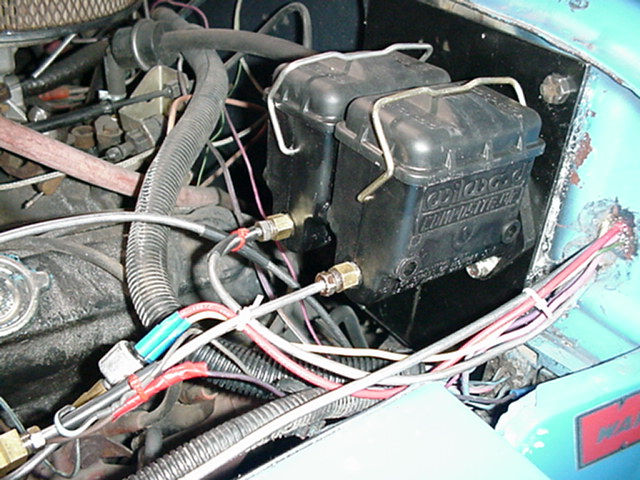
Another shot up a bit closer. I had to purchase a few new brake lines and also had to cut some lines and change the end connectors. Get a double flare kit and PRACTICE making the ends beforehand so you can make good, leakproof connections. And DON'T forget to put the connector on the line BEFORE doing the flare. Yep, voice of experience again. :o) I finished off by running some clear ATV to fill any cracks, gaps or holes. |
| To sum it up, this was a fairly easy task. I can now lock up the rear wheels, or the front wheels, or both if I want. Probably the most difficult part was the removal of the old system. Next would be the actual making of the template and getting everything to fit. Took me several tries to get it right. Stuffing the pedals down through the hole presented a bit of a problem because there isn't much room and I did pull a couple of wires loose. Bleeding the rears took a while too. Took two people to complete that. Sure could have used that power bleeder. Be fun to see how I can use this on the trail. If you would like more info or have any questions (like 'why' or 'how do they work' or whatever), please contact me at glenn@jeeper4x4.com ... | |
|
Master Cylinders - 1" Wilwood Composite Master Cylinder. Part number 260-1103 Forward mount single pedal assembly - Part number 340-1290 All pictures taken with a digital Sony Mavica FD-83 on lowest resolution (640x480) |
|